In this article, we show you how to train a TensorFlow object detection model on your own data. This is a tool that can recognize things in pictures. We use TensorFlow to teach it. We explain each step clearly, from gathering pictures and preparing data to telling the model what to look for. By the end, you have a tool to spot objects in your own projects. Also, make sure you have Python version 3.9 installed before we start. If you want help with AI projects, see our AI product engineering work.
Creating A Dataset
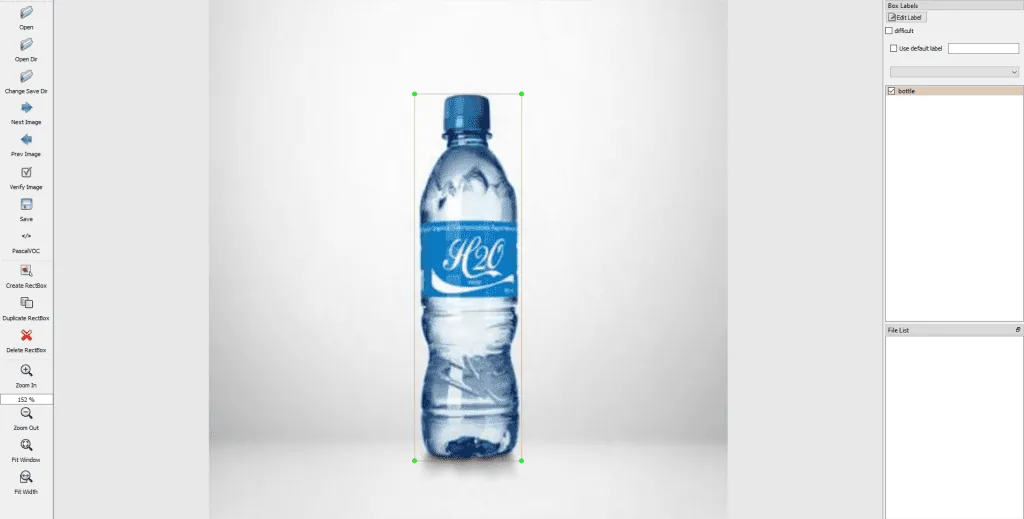
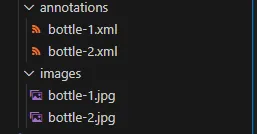
To build a dataset, first gather images for training. In my case, I want to train a model to detect plastic bottles. Therefore, I collected images containing plastic bottles and stored them in a directory named “images.” Annotations on these images are essential for training the model. To create them, start by installing labelImg using:
“pip install labelImg”
Then, run “labelImg” from the command prompt. With labelImg, you can mark objects in the images and save the file. Each image gets its own XML file in the “annotations” directory. The dataset format here follows the pascal_voc standard.
Here’s a step-by-step demo of using labelImg:
- First, click “Open Dir” on the left side menu and select the directory with the images you want to label.
- Then, once you select an image, click the “Create RectBox” button. Draw a box around the object of interest, such as a plastic bottle, and label it.
- However, if an image has multiple objects, repeat the previous step for each object.
- After labeling, click “Save” on the left side menu to create an XML file.
- Finally, click “Next” to move to the next image and repeat the labeling process from step 2.
Your images and annotations directory should look like this.
Prerequisites
Install the required packages
- pip install tflite-model-maker
- pip install numpy==1.23.5
- pip install tensorflow-datasets==4.8.3
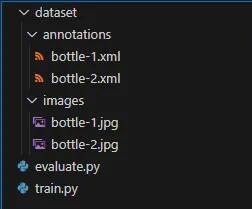
Directory Structure
Because this is a custom object detection project, a simple and effective directory structure is important.
TensorFlow Object Detection Model Training Process
					from tflite_model_maker import object_detector
from tflite_model_maker import model_spec
import os
image_dir = os.path.join("dataset","images")
annotations_dir = os.path.join("dataset", "annotations")
data = object_detector.DataLoader.from_pascal_voc(image_dir, annotations_dir, label_map={1: "bottle"})
spec = model_spec.get('efficientdet_lite4')
spec.config.var_freeze_expr = 'efficientnet'
model = object_detector.create(data,model_spec=spec, epochs=100, batch_size=2,train_whole_model=True)
# Export the trained model.
model.export(export_dir='.')
This code trains a machine learning model to detect objects in images, with a focus on bottles. Here is a breakdown of the steps.
1. Importing Libraries:
- tflite_model_maker: This library helps you create TensorFlow Lite models easily.
- model_spec: This library provides predefined model specifications.
Defining Directories:
- image_dir: This variable stores the directory path where images for training are stored.
- annotations_dir: This variable stores the directory path where annotations (labels) for the images are stored.
Loading Data:
- Object_detector.DataLoader.from_pascal_voc: This function loads data in the Pascal VOC format, which is a standard format for storing annotations (bounding boxes around objects) along with images. It loads images from image_dir and their annotations from annotations_dir. In this case, it looks for bottles, which are labeled as class 1.
Defining Model Specification:
- model_spec.get(‘efficientdet_lite4’): This line defines the model specification. It selects a pre-trained model called “efficientdet_lite4”, which is an efficient object detection model.
Creating the Model:
- object_detector.create: This function creates the object detection model from your data and model specification. It trains the model for 100 epochs (passes over the entire dataset) with a batch size of 2. It also trains the entire model, not just the top layers.
Exporting the Trained Model:
- model.export(export_dir=’.’): This line exports the trained model to the current directory. Then you can use the model for inference (making predictions) on new images.
Making Predictions With the Trained TensorFlow Object Detection Model
Now that you have trained the model, you can load the saved model and make predictions.
					import cv2
import numpy as np
from PIL import Image
import tensorflow as tf
from tflite_support import metadata
from tflite_model_maker import object_detector
model_path = 'model.tflite'
# Load the TFLite model
interpreter = tf.lite.Interpreter(model_path=model_path)
interpreter.allocate_tensors()
displayer = metadata.MetadataDisplayer.with_model_file(model_path)
# Load label list from metadata.
file_name = displayer.get_packed_associated_file_list()[0]
label_map_file = displayer.get_associated_file_buffer(file_name).decode()
label_list = list(filter(lambda x: len(x) > 0, label_map_file.splitlines()))
# Load labels (if available)
num_classes = len(label_list)
classes = ['???'] * num_classes
for label_id, label_name in enumerate(label_list):
    classes[label_id] = label_name
# Define a list of colors for visualization
COLORS = np.random.randint(0, 255, size=(len(classes), 3), dtype=np.uint8)
1. Loading the Model:
- interpreter = tf.lite.Interpreter(model_path=model_path): This line loads the TensorFlow Lite model from the path you give it.
2. Loading Metadata:
- displayer = metadata.MetadataDisplayer.with_model_file(model_path): This line loads the metadata of the model.
- label_map_file = displayer.get_associated_file_buffer(file_name).decode(): Then it extracts the label information from the metadata.
					def preprocess_image(image_path, input_size):
  """Preprocess the input image to feed to the TFLite model"""
      img = tf.io.read_file(image_path)
      img = tf.io.decode_image(img, channels=3)
      img = tf.image.convert_image_dtype(img, tf.uint8)
      original_image = img
      resized_img = tf.image.resize(img, input_size)
      resized_img = resized_img[tf.newaxis, :]
      resized_img = tf.cast(resized_img, dtype=tf.uint8)
      return resized_img, original_image
3. Preprocessing the Image:
- preprocess_image function: This function reads an image from a file. Then it resizes the image to the input size the model needs and prepares it for the model.
					def detect_objects(interpreter, image, threshold):
  """Returns a list of detection results, each a dictionary of object info."""
      signature_fn = interpreter.get_signature_runner()
      # Feed the input image to the model
      output = signature_fn(images=image)
      # Get all outputs from the model
      count = int(np.squeeze(output['output_0']))
      scores = np.squeeze(output['output_1'])
      classes = np.squeeze(output['output_2'])
      boxes = np.squeeze(output['output_3'])
      results = []
      for i in range(count):
        if scores[i] >= threshold:
          result = {
            'bounding_box': boxes[i],
            'class_id': classes[i],
            'score': scores[i]
          }
          results.append(result)
      return results
4. Detecting Objects:
- detect_objects function: This function runs object detection on the preprocessed image with the model interpreter. As a result, you get a list of detected objects with their bounding boxes and confidence scores.
					def run_odt_and_draw_results(image_path, interpreter, threshold=0.5):
  """Run object detection on the input image and draw the detection results"""
      # Load the input shape required by the model
      _, input_height, input_width, _ = interpreter.get_input_details()[0]['shape']
      # Load the input image and preprocess it
      preprocessed_image, original_image = preprocess_image(
          image_path,
          (input_height, input_width)
        )
      # Run object detection on the input image
      results = detect_objects(interpreter, preprocessed_image, threshold=threshold)
      # Plot the detection results on the input image
      original_image_np = original_image.numpy().astype(np.uint8)
      for obj in results:
        # Convert the object bounding box from relative coordinates to absolute
        ymin, xmin, ymax, xmax = obj['bounding_box']
        xmin = int(xmin * original_image_np.shape[1])
        xmax = int(xmax * original_image_np.shape[1])
        ymin = int(ymin * original_image_np.shape[0])
        ymax = int(ymax * original_image_np.shape[0])
        # Find the class index of the current object
        class_id = int(obj['class_id'])
        # Draw the bounding box and label on the image
        color = [int(c) for c in COLORS[class_id]]
        cv2.rectangle(original_image_np, (xmin, ymin), (xmax, ymax), color, 2)
        # Make adjustments to make the label visible for all objects
        y = ymin - 15 if ymin - 15 > 15 else ymin + 15
        label = "{}: {:.0f}%".format(classes[class_id], obj['score'] * 100)
        cv2.putText(original_image_np, label, (xmin, y), cv2.FONT_HERSHEY_SIMPLEX, 0.5, color, 2)
      # Return the final image
      original_uint8 = original_image_np.astype(np.uint8)
      return original_uint8
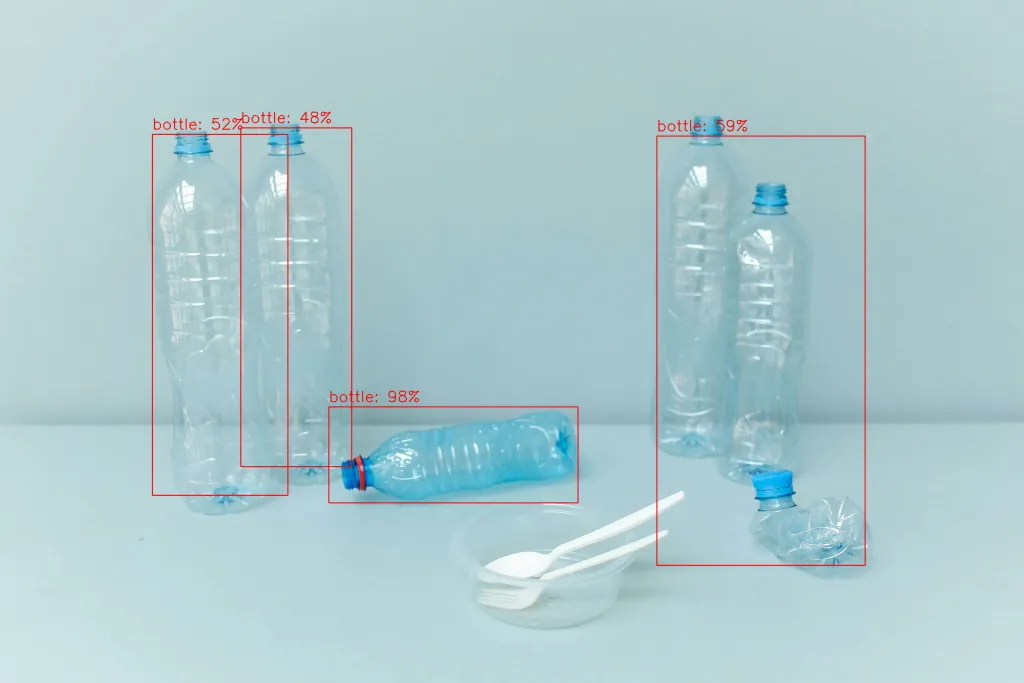
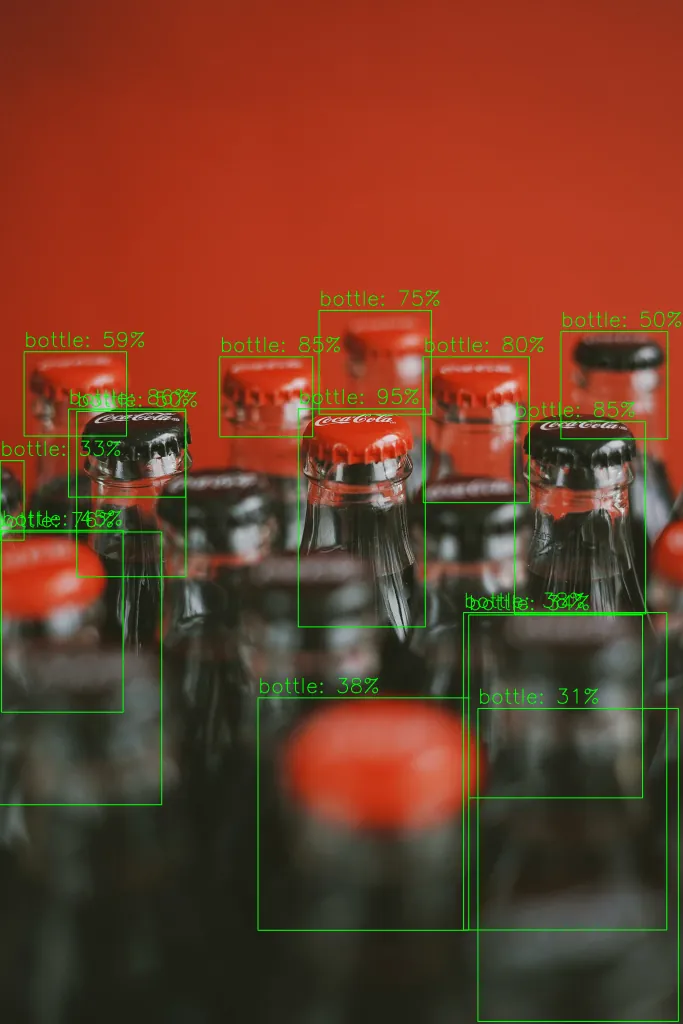
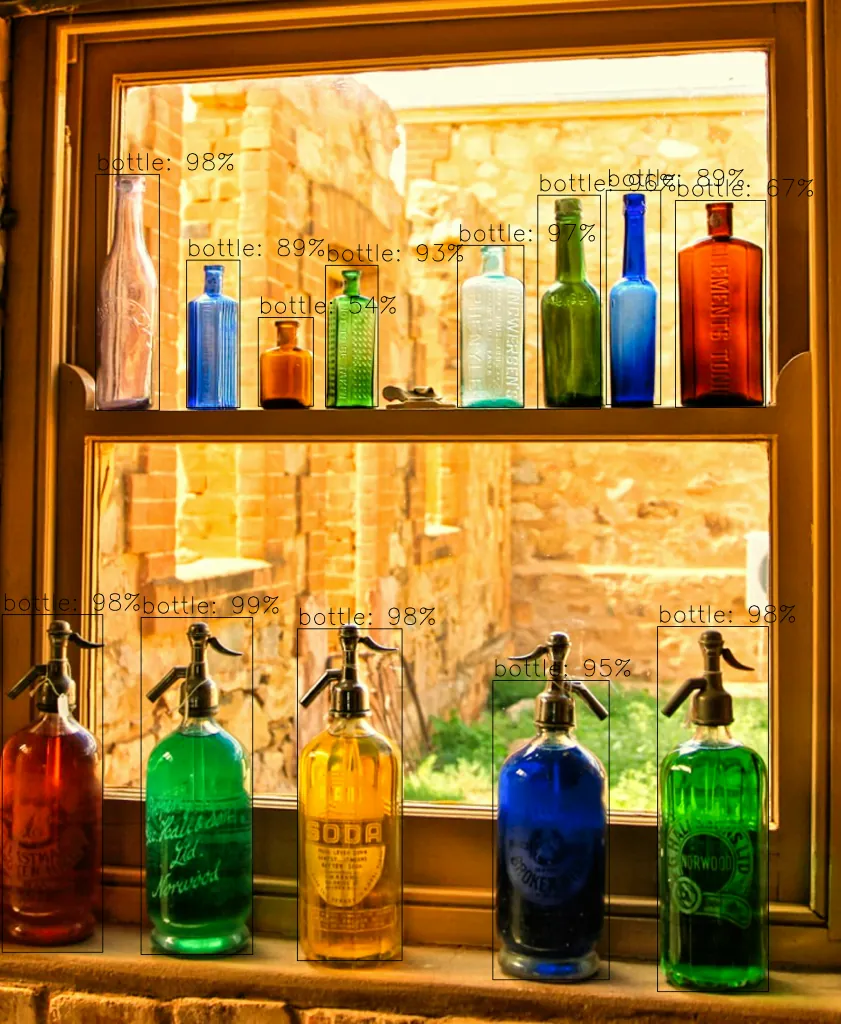
5. Drawing Results on Image:
- run_odt_and_draw_results function: This function takes an image path and runs object detection on it. Then it draws bounding boxes and labels on the image for each detected object.
					INPUT_IMAGE_URL = "test_images/bottle.jpg"
DETECTION_THRESHOLD = 0.3
# Run inference and draw detection result on the local copy of the original file
detection_result_image = run_odt_and_draw_results(
    INPUT_IMAGE_URL,
    interpreter,
    threshold=DETECTION_THRESHOLD
)
detection_result_image_rgb = cv2.cvtColor(detection_result_image, cv2.COLOR_BGR2RGB)
cv2.imwrite("image.png", detection_result_image_rgb, [cv2.IMWRITE_PNG_COMPRESSION, 0])
6. Running Object Detection and Displaying Results:
- run_odt_and_draw_results is called with the input image URL and other parameters, such as the detection threshold.
- Then the code draws the detected objects on the image and saves the result as an image file.
- Finally, it converts the result image to RGB format and displays it.
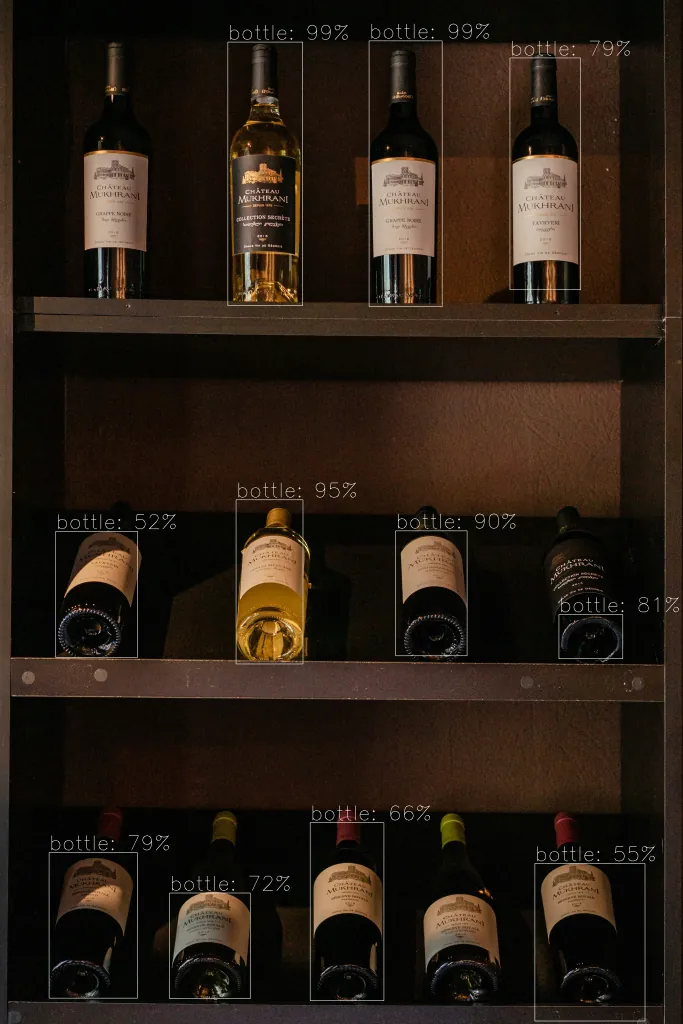
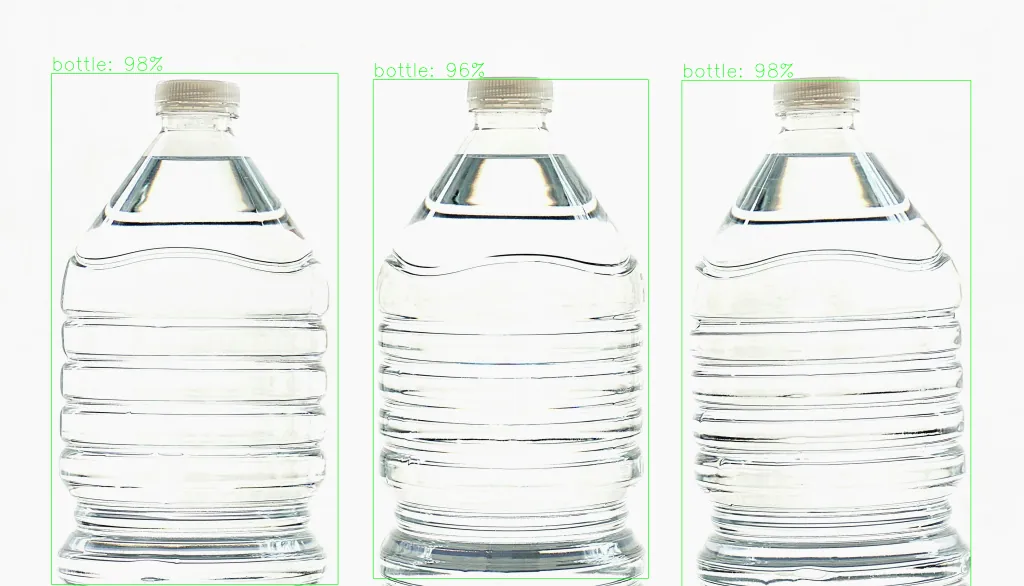
Result
Need a website or web app?
We build on WordPress, Webflow, Shopify, Bubble and custom stacks.