
BIRT, the Business Intelligence Reporting Tool, helps businesses create clear reports for data analytics and decisions. Those reports can improve business performance. However, you also need to integrate BIRT into your web application. In theory, you can run reports from its templates right away. In practice, it does not work that way.
To get the best from BIRT, link it with your web applications. Then the functions stay in sync and you can work with them more easily. For example, reports can show data straight from your application. So how do you integrate BIRT into your web application? This article shows you the steps.
Steps to Integrate BIRT into Your Web Application
Add Dependencies to Integrate BIRT
First, add the dependencies. This means you connect the application with the existing libraries through a project builder such as Maven. Below is the code you need to run:
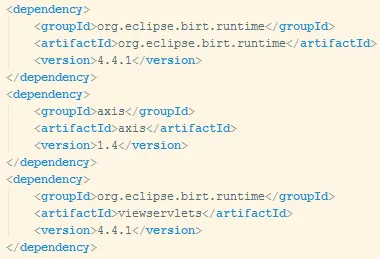
After you run the code, the dependency is ready. Then you can move on to the next part of the BIRT integration, which is the configuration.
Deployment Descriptor Configuration
Once the dependencies exist, you need to fill in some information for the BIRT server deployment. You add and configure all of it in the web.xml file.
Below is the list of commands, code and information you need.
1. Set the location of the working folder in BIRT. This is the folder that holds all the reports.
2. Set a flag value for the location of the reports. Usually, the reports come only from the working directory, and the default flag value is TRUE.
3. Specify the parameters that work with the URL addresses of the reports. There are several values, and they depend on the kind of report URL.
4. Define the location of the configuration file.
5. Define where the print function is available, either only on the client side or on the server side as well. By default, the function is ON.
6. Set a flag that turns browser optimization in HTML on or off. The default value is TRUE.
7. Specify the class names for the reports.
8. Set the Servelet Context and HTTPSessionListener.

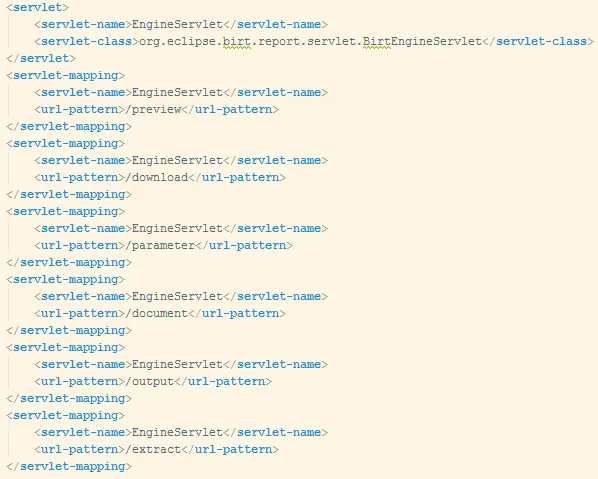
9. Register and configure the ViewerServelet and the Engine Servelet.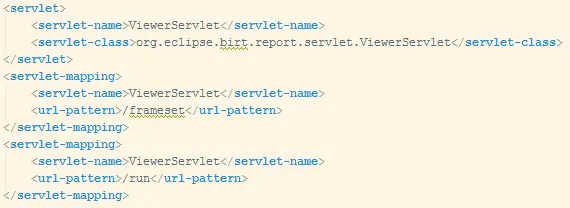
Finish the Configuration
After these steps, the configuration is done. Now you connect the program files and add a report template to the project. With that, you finish the BIRT integration.
Connecting Program Files
To connect the program files, first download two archives: webcontent.zip and programfiles.zip.
Then create your own folders and a tlds directory. After that, put the files from the programfiles.zip archive into the web application like this:
birt.tld into /webapp/WEB-INF/tlds
erver-config.wsdd files and viewer.properties into /webapp/WEB-INF
Once you finish, the folders and files look like this: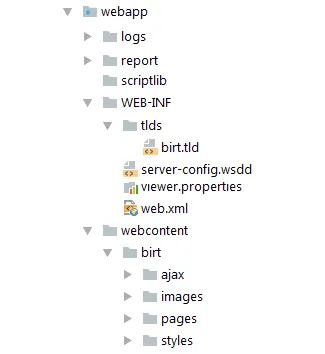
Adding Reports
Now the BIRT components are part of the web application, so the reports can show. Just put the report templates into the /webapp/report folder.
When you finish, it looks like this: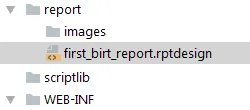
Also, you can put a link to your report in the web application. This makes report management easy.
Finally, run the application with the following code and command.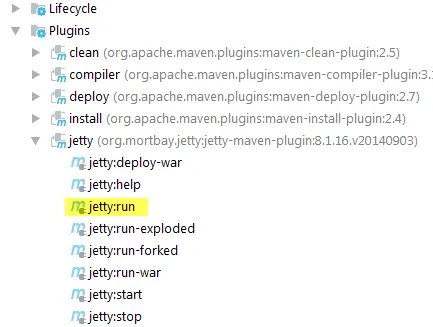
After you run the application, your report shows up in it.
Conclusion
So, this is how you integrate BIRT into a web application and use the tool in a practical way. If you need help with a project like this, see our web development services, or visit the official Eclipse BIRT site. Hope this helps!
Have a question about this?
Book a 30-minute call with an engineer who works on it.