
Why Lightning Web Components?
In today’s digital age, having a strong online presence is crucial for any business or individual. Building a website from scratch can seem like a daunting task. However, with the right tools and knowledge, it can be a rewarding experience. Salesforce Lightning Web Components (LWC) provides a modern and efficient way to develop web applications. In this article, we explore how to build and deploy a website with Salesforce LWC, starting from scratch. Developers can expand their skills this way. Business owners can also use it to create an online presence. Either way, we guide you through the process step by step.
Create a Website with Salesforce LWC Site Builder
Salesforce’s Site Builder enables you to create highly customized and visually appealing websites. To make a website in Salesforce, follow these steps:
- Enter sites in the Quick Find box from Setup, then select sites.
- Register the Salesforce Sites domain for your company.
- Create and configure your website.
Using the Quick Find box, you can search for all sites after you have registered your site domain.
- Click on the New button visible on the site.
- Choose any website which is relevant to your website.
- Create site.
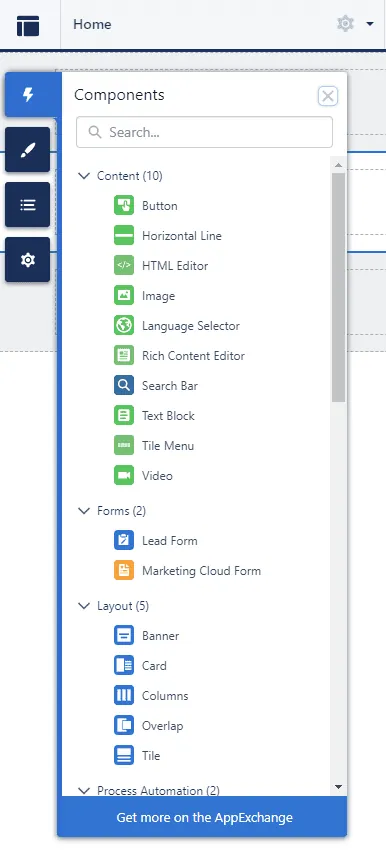
Browsers follow web standards, which constantly evolve and improve the content that browsers can display to users. For this reason, Salesforce created Lightning Web Components to allow Salesforce platform developers to take advantage of those evolving standards.
When we create Lightning web Components, we can add functionality and properties that make components very easy to use. You can also use standard HTML, CSS, and JavaScript to create a component.
You can use your Component anywhere in the Salesforce as well as in the website.
Here are some of the benefits of LWC:
- Improved performance
- The majority of your code is standard JavaScript and HTML.
- Simple to use and deploy
- Reusability
Create Lightning Web Component
Next, let’s make a simple Component to show how it works for your website with Salesforce LWC. We will use Visual Studio Code to create a component.
- Go to Visual Studio Code.
- Install Salesforce Extension Pack in VS Code.
- After installed successfully, Press Ctrl +Shift + P, then search for Create Project, Select SFDX: Create Project, and Press Enter.
- Leave the default Selection Standard and Press Enter.
- Enter the Project Name and Press Enter.
- Choose the directory on your local machine where the project will be stored and then Click Create Project.
Then Salesforce CLI creates a project structure to make getting started even easier.
The structure looks like this:
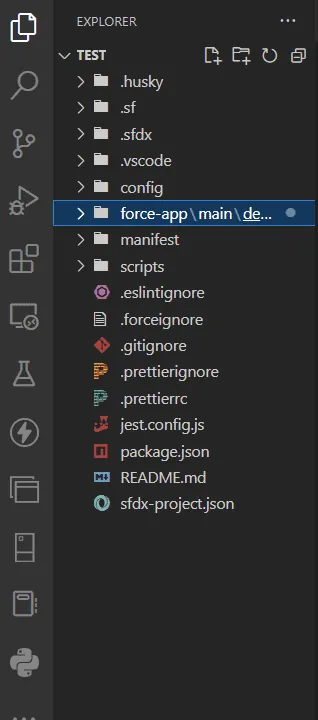
The project we made has a unique folder called force-app/main/default. This folder, known as a package directory, contains all of your current Salesforce DX project’s metadata.
That finishes your first Salesforce Project for working with Lightning Web Components.
Authorize Org
After you create the project, the next step is to authorize your organization. To authorize your org with Salesforce, follow the steps below:
- In Visual Studio Code, press Ctrl + Shift + P.
- Search for sfdx in command palette.
- Select SFDX:
- Authorize a Dev Hub.
- Enter the name for your org authorization and Press Enter.
- It will redirect you to Salesforce login page, login in your org using your Salesforce credentials.
- Click Allows when asked for Allow Access.

Creating a lightning Web Component
To create a lightning web component, follow the below steps-
- Open Visual Studio Code.
- Press Ctrl + Shift + P and search for lightning web component.
- Select SFDX: Create Lightning Web Component.
- Creating a Lightning web component is simple, because Salesforce CLI has already built a project structure for you.
The folder structure looks like this:
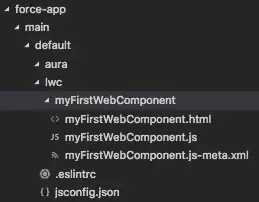
You have now created your first Lightning web component.
Edit and Deploy the Component for Your Website with Salesforce LWC
Let’s take a look at the files that are generated. Open the subfolders of the newly created folder myFirstWebComponent.
Replace the XML Markup – in the XML subfolder.
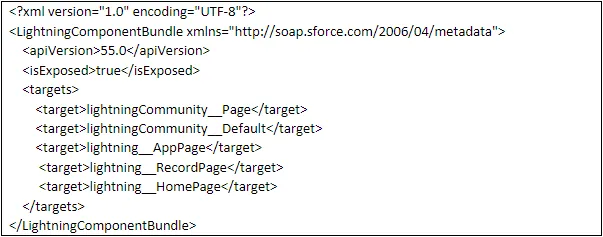
- In Visual Studio Code Click on the myFirstWebComponent.html subfolder.
- Code in html by using its tags or you can also use the lwc html tags for component creation.
Or replace your code with this example:

- You can also customize your Component by using CSS in it. Create a file with the same name as the Lightning component and add the extension .css. Salesforce adds the file to the component folder automatically. Then you can add CSS to customize your component. To add JavaScript functionality, write JavaScript in the .js file. Finally, deploy the first Component to the LWC site.
- In visual Studio Code, Press Ctril + Shift + P and search for Deploy source to org.
- Select SFDX: Deploy this source to org and Press Enter.
Your Component then deploys to the Salesforce org. When the deployment succeeds, the terminal shows a success message.
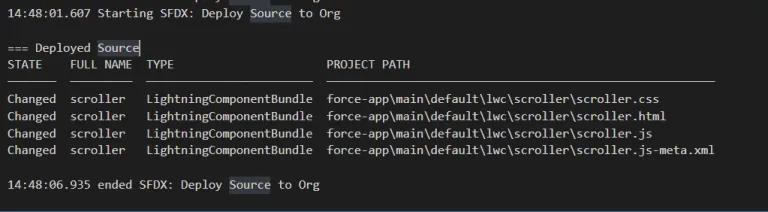
- After deployment to the Salesforce Org, the component appears in the custom Component section of the LWC Site Builder.
- Drag and drop the Component in the Column of the section the Site Builder.

- In this way, you can create your own Component like these and add customization and functionality in it through js.
Conclusion
You can create and customize websites in less time with Salesforce LWC Site Builder and Lightning web components. Also, the builder’s prebuilt components save time. This is how we built a website with Salesforce Lightning Web Components from scratch. For more help, see our custom software development services.
Have a question about this?
Book a 30-minute call with an engineer who works on it.