
Redux gives you a great developer experience, with a large ecosystem of add-ons to fit your requirements. This article shows you how to build easy to test programs with Redux. We go from the concepts to practical examples. By the end, you will build a counter program and understand how to use Redux in a React project. Our web development team uses the same approach.
The program we make is a simple increment and decrement counter in React. You will see it on many ecommerce websites like Amazon, Flipkart, and Myntra. It lets you raise or lower the quantity of the product you want to buy.
Build a Single Global Store to Test Programs with Redux
Redux is an application state container tool. It lets you set up a single global store for your program, and all components can access that one store.
Passing props and state to child and sibling components in a React application can be tough. For this reason, Redux lets us pass data to any component.
The React Redux library is not only for React. You can also use it with other libraries or frameworks, including Angular, Vue, and plain JavaScript.
Understand State Flow Before You Test Programs with Redux
State management presents the data you use in your application as a data structure. Therefore, it is easier to exchange this data between components. It also helps components talk to each other and know about any updated data.
In React, many libraries handle state management, such as Redux, Recoil and the Context API.
Redux gives you one single store for a large amount of data.
Redux Practical Example
This app lets you increase or decrease the value of a state with Redux in your React application.
You can use this logic in any ecommerce React project to change product quantity. I have used it in a React project.
Installation in Application
After you create your first React application, follow these steps to install Redux.
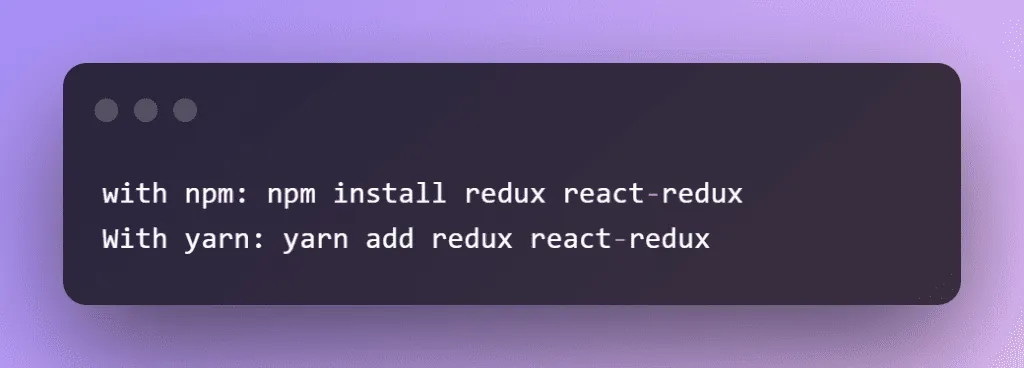
Remember that both redux and react-redux must be installed.
We can create the store with redux, and we can use redux in a React app with react-redux.
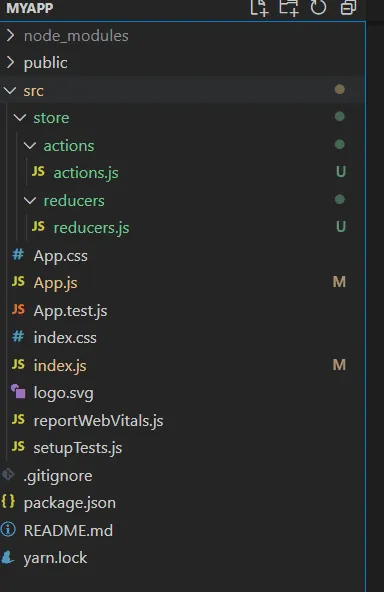
Create a folder called Store after the installation is complete. Create two new folders under this one, one named actions and the other named reducers.
You can name the folders whatever you wish. However, this is the recommended method. Always name folders and files after the action they handle, so that any new coder can understand them.
Coding
To work with Redux, you go through a few steps. They apply no matter which type of application you build. Follow these steps:
1- Understand actions
2-Understand reducers
3-Understand store
4- Dispatching the actions
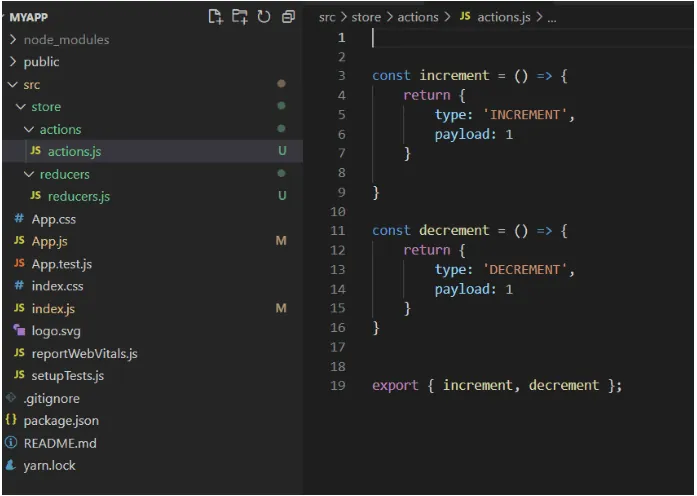
Actions
Action is merely a function that returns a two-attribute object: –
- Type: a string that describes the action you’re performing.
- Payload: – Payload is the data you’ll use to update your state.
In our scenario, we’ll need two actions: one to increase the status, and another to decrease it.
It is best to write action types in capital letters.
Reducer
The reducer is the function that performs the incrementing or decrementing operation. It requires two inputs. The first parameter specifies the state to be updated, while the second specifies the action to be performed on the state in order to change it.
Note that Redux treats whatever you pass as the reducer’s first parameter as the state, and it records that state in the store automatically.
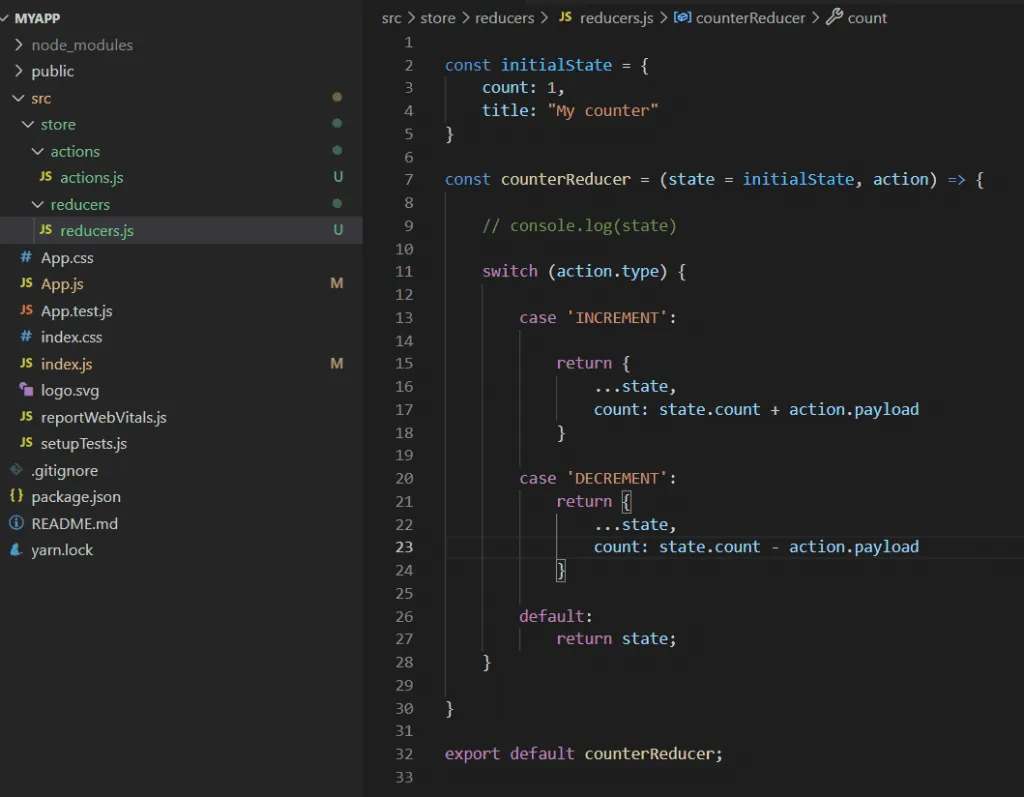
First, we created an object called initialState and used it to set the state parameter.
The reducer will return to the state with the same fields unmodified, except for the count field, which will be added to the value of the payload, depending on the action type ‘INCREMENT’ or ‘DECREMENT.’
Store
We need to create the store now that we have our actions and reducer ready. Do the following in the index.js file.
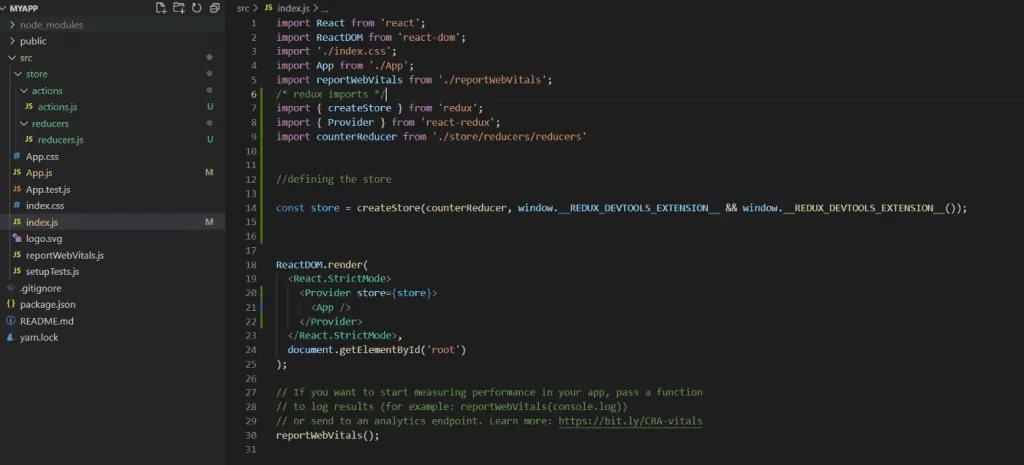
To create the store, we use the createStore method from Redux, which looks like this:
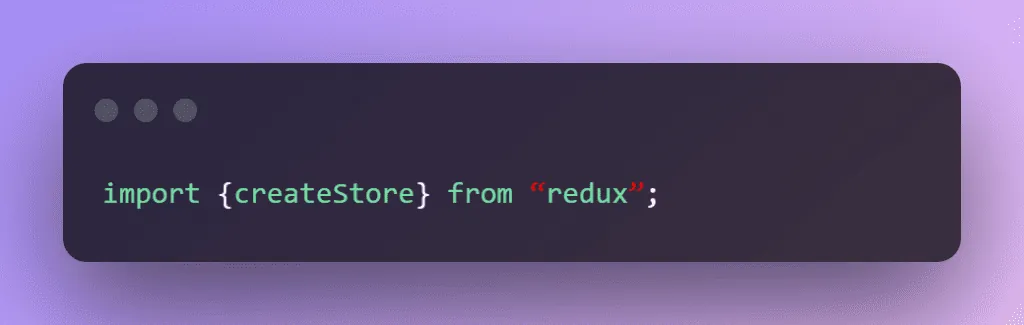
We use the Redux dev tools extension to see the state as it updates. Add it to your browser. Then, alongside the reducer, add the following to your createStore method.
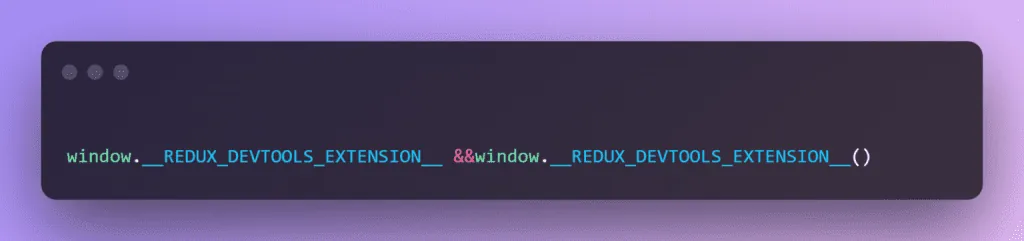
We import a Provider from react-redux to make the store available to all components. The Provider passes the store to our app as a prop. As a result, all components can access the data.
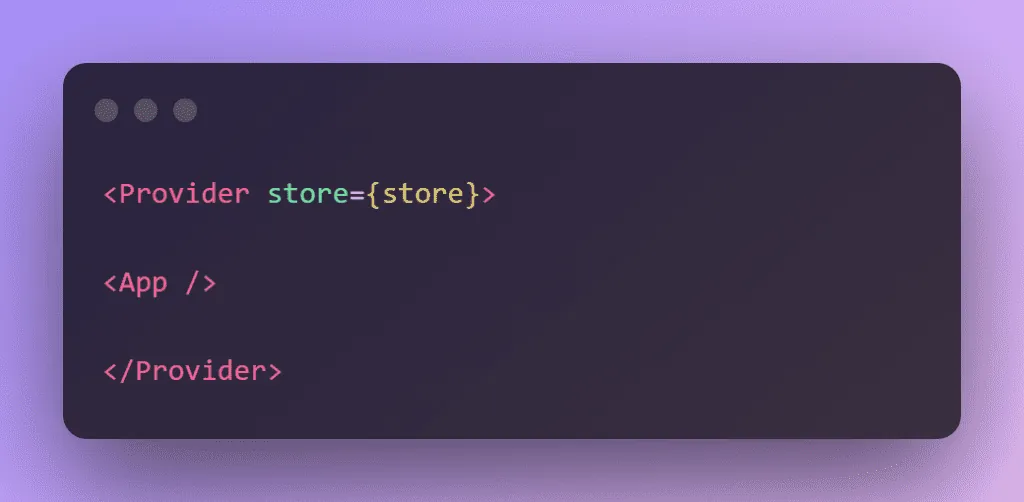
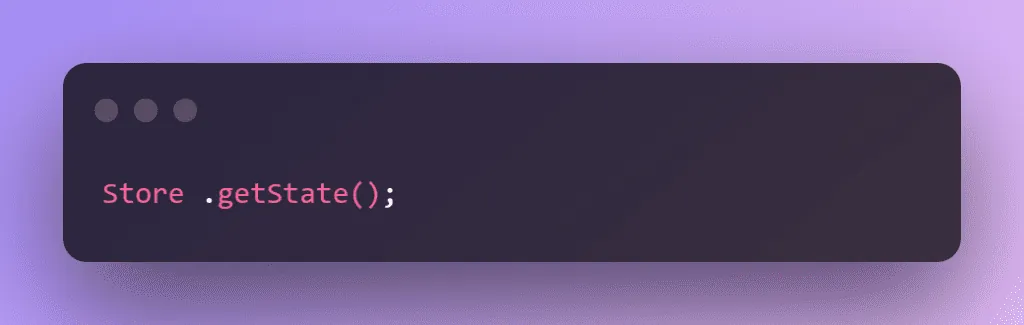
If we want to get any data from redux store, or want to get redux state we can get it by: –
Defining the Dispatcher
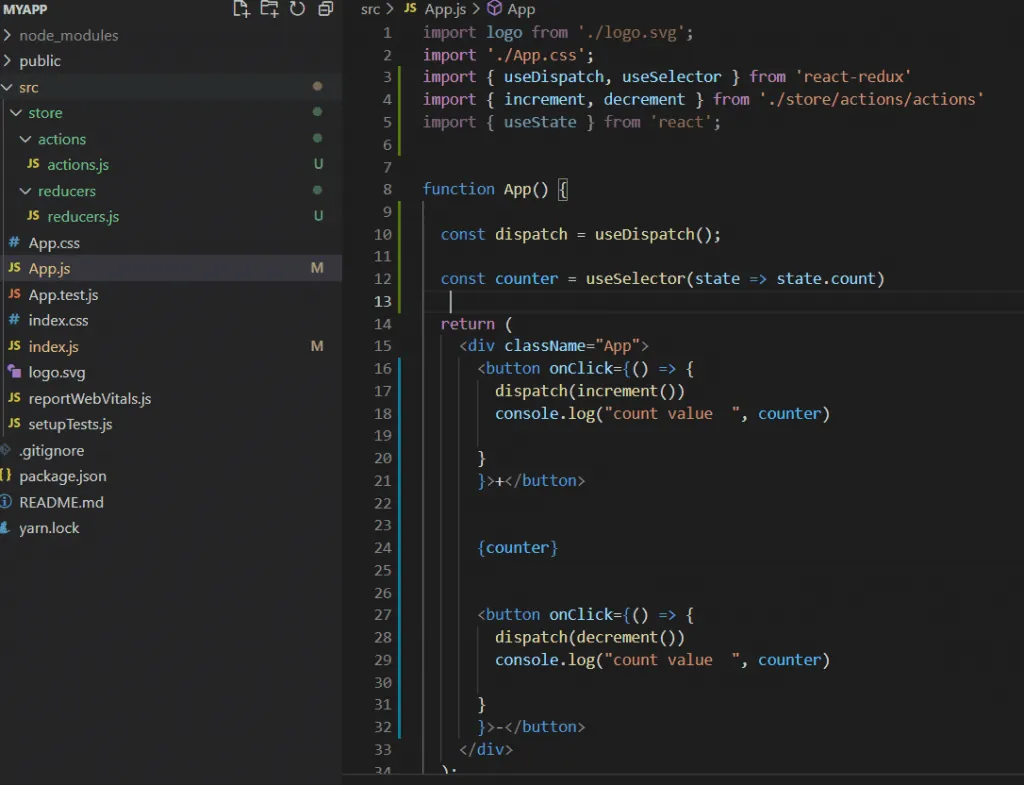
The useDispatch hook defines the dispatcher. The dispatcher is a function that takes an action as a parameter and tells the reducer to run it.
When we press the + button, the dispatcher sends the increment action to the reducer, which then applies it to the state.
When we press the – button, the dispatcher sends the decrement action to the reducer, which then applies it to the state.
However, how can we get the state from this file?
Because of the store, we can use the useSelector hook, which takes the state we saved in the store as an argument by default.
Then we can use it to reach our state from any component.
React State Management Flow
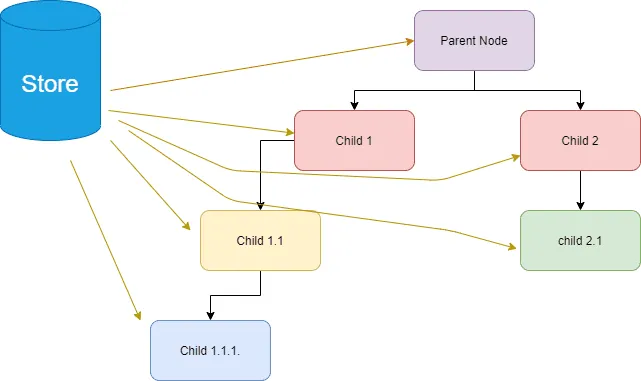
The diagram below shows the basic flow of the React Redux store to other components, from parent to child and to sibling components.
There is only one store with one single state. Data then passes smoothly from parent to child components and beyond.
Conclusion
As we have seen, Redux is easy to use and saves time. Redux is not required for a React application. However, if you use it, you get a better user experience because everything goes faster and smoother. Also, if you build a large and complex application, it is a powerful tool to manage your application states, and you can test programs with Redux more easily.
I use Redux in two React applications, and it is a very helpful tool for state management.
Have a question about this?
Book a 30-minute call with an engineer who works on it.