
Zabbix is a highly integrated network monitoring solution. It is open-source and offers multiple features in one single package. This guide walks through Zabbix installation on CentOS. You do not need to install any additional software on the monitored host, and some normal checks can confirm the use of services like SMTP and HTTP.
From servers and proxies, Zabbix selects the data you need for your analysis at custom intervals, so every measurement stays accurate. A back-end database lets you refer to values and define problem thresholds, which are also known as triggers. You can use macro variables to make notifications more meaningful and helpful. Then you can send them in a customized way, based on escalation schedules, media types, and recipients. Remote commands let you automate actions as well.
The solution has a visualization feature that quickly graphs the monitored items. You can also check functionality and response time on a website by collecting data on mouse clicks. Moreover, Zabbix can give you one single view of many items by creating custom graphs for them. It also offers a dashboard-style overview, for which Zabbix creates custom screens, network maps and slide shows.
You can install and configure Zabbix on Windows or UNIX hosts and track information like disk space, CPU load, network utilization, and more. The Zabbix proxy collects data from Zabbix agents on remote servers. It can then send that data to the Zabbix server, which stores it in the Zabbix database. Alexei Vladishev created the first Zabbix release in April 2001, naming it Zabbix 1.0 alpha 1.
Step by Step Zabbix Installation on CentOS
Prerequisites
- Cent-OS machine
- MySQL Database
- Root Privilege
- Hardware requirements:
- 128 MB of Physical memory
- 256 MB of Disk space
Zabbix Server Installation on CentOS
1. Update your repositories
First, update your existing repositories with the command below.
sudo yum update2. Install official repository
Then install the official Zabbix repository with this command.
sudo rpm -ivh http://repo.zabbix.com/zabbix/4.0/rhel/7/x86_64/zabbix-release-4.0-1.el7.noarch.rpm3. Enable repository
After that, enable the repository you just installed.
    sudo yum --enablerepo="base" -y install yum-utils
    sudo yum-config-manager --enable rhel-7-server-optional-rpms
4. Configure MySQL Database for Zabbix
Log in to MySQL, then run the commands below to create a new Zabbix user and database.
    mysql> CREATE DATABASE zabbixdb CHARACTER SET UTF8;
    mysql> GRANT ALL PRIVILEGES on zabbixdb.* to zabbix@staging1.zehntech.com IDENTIFIED BY 'zabbix';
    mysql> FLUSH PRIVILEGES;
    mysql> quit
5. Zabbix server configuration
Open the zabbix_server.conf file for configuration with this command.
sudo vim /etc/zabbix/zabbix_server.conf Now update and uncomment the values below to match your configuration.
-
- DBHost=localhost (enter your host name or ip address here)
-
- DBName=zabbixdb (enter your database name here)
-
- DBUser=zabbix (enter your database user here)
- DBPassword=zabbix (enter your database password here)
Save and exit
6. Start zabbix service
Start zabbix-server with the command below.
sudo service zabbix-server startAlso enable zabbix-server with this command.
sudo systemctl enable zabbix-server7. Tunning Frontend
Open the zabbix.conf file with this command.
sudo vim /etc/httpd/conf.d/zabbix.conf8. Enable Time Zone
Enable the time zone by uncommenting the line below, then save and exit.
php_value date.timezone Europe/Riga 9. Restart Services
Restart the following services with these commands.
    sudo service httpd restart
    sudo service mariadb restart
    sudo service zabbix-server restart
10. Check Status
Then check the status of these services with these commands.
    sudo service httpd status
    sudo service mariadb status
    sudo service zabbix-server status
Output of these above commands should be active e.g. [Active: active (running)]
11. Zabbix Installation on CentOS: Configure the Web Browser
-
- Open your favourite browser and insert this URL (ip_address/zabbix)
- If you see this Welcome Page then click `Next step` button
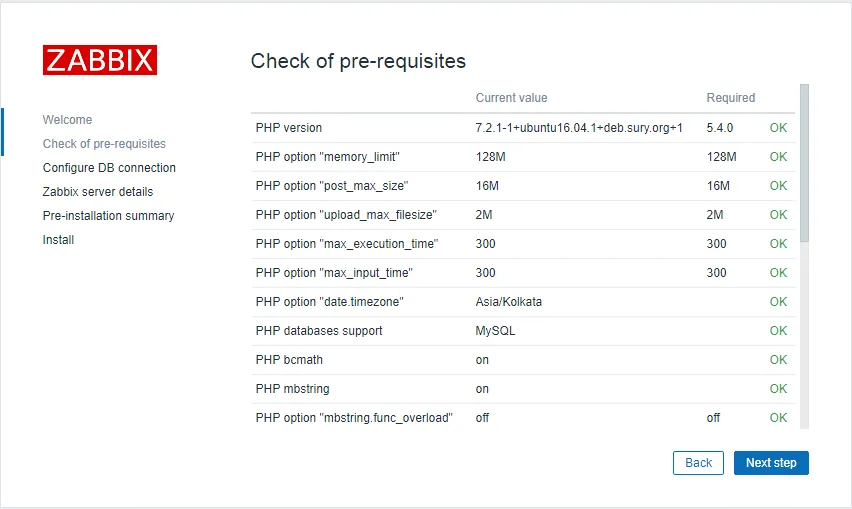
- Check pre-requisites and click `Next step` button
-
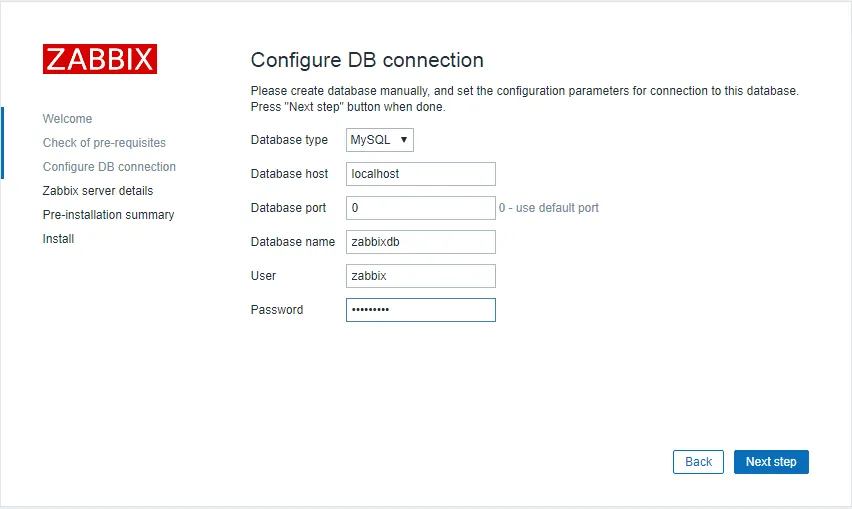
- Click `Next step` button after configure DB connection
-
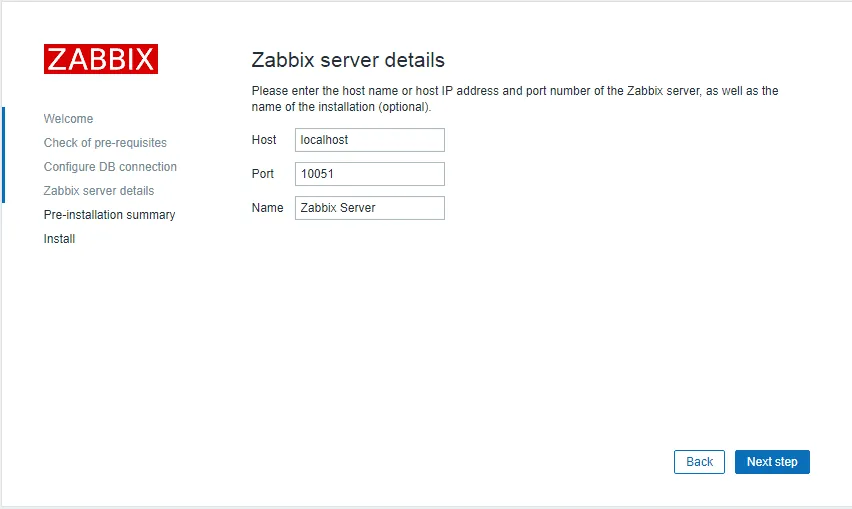
- Click `Next step` button after enter Zabbix Server details
-
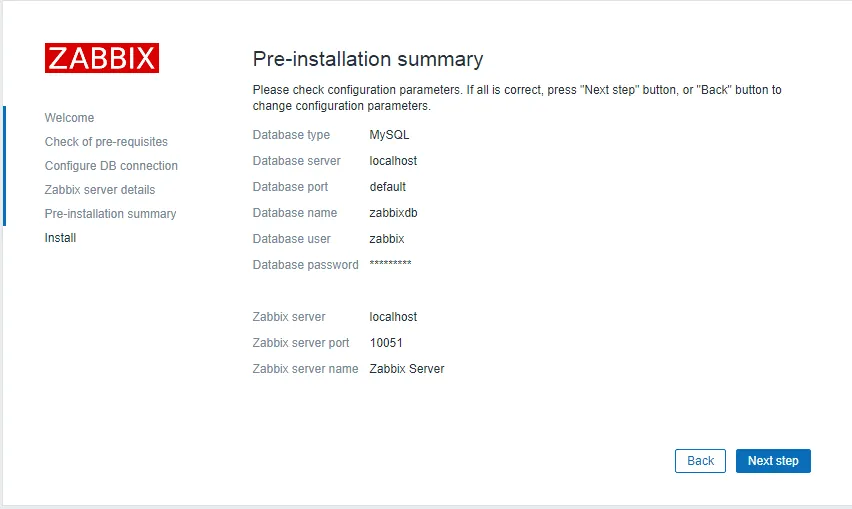
- Confirm everything and click `Next step` button
-
- Click `Finish` button
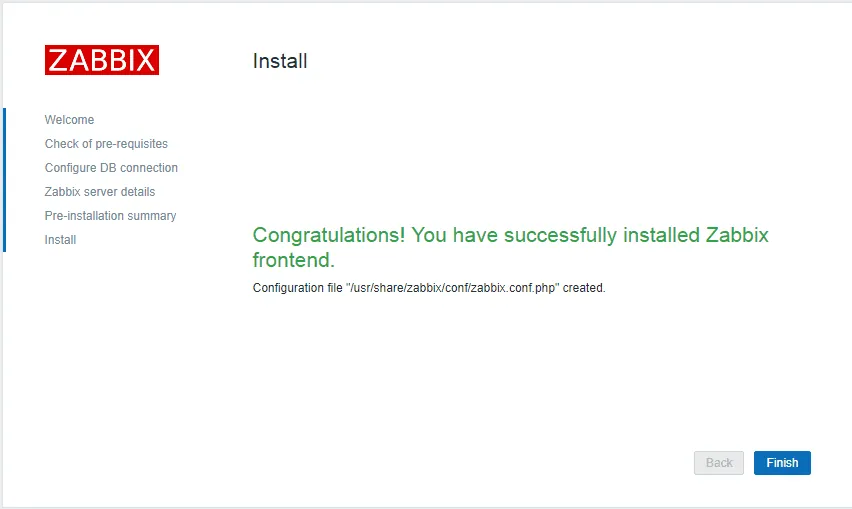
12. Login Zabbix
-
- Username: Admin (default)
- Password: zabbix (default)
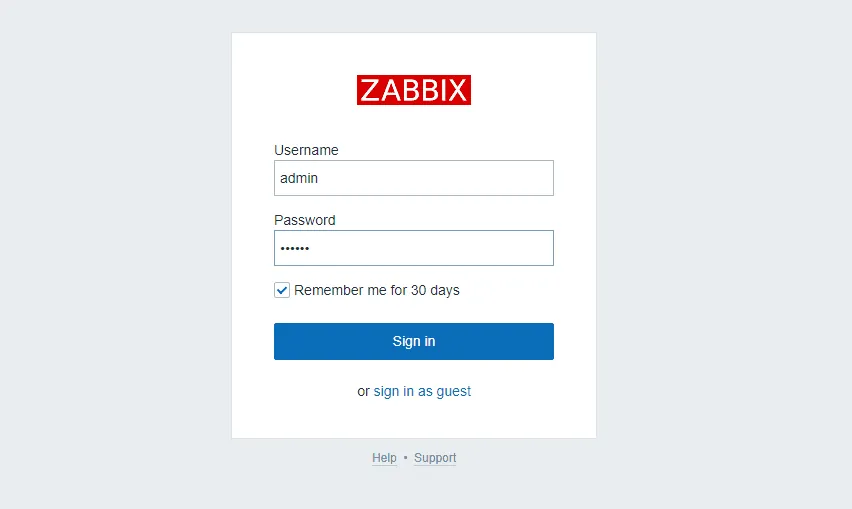
13. System Information on Dashboard
-
-
Zabbix server is running: Yes hostname:10051 (default port)
-
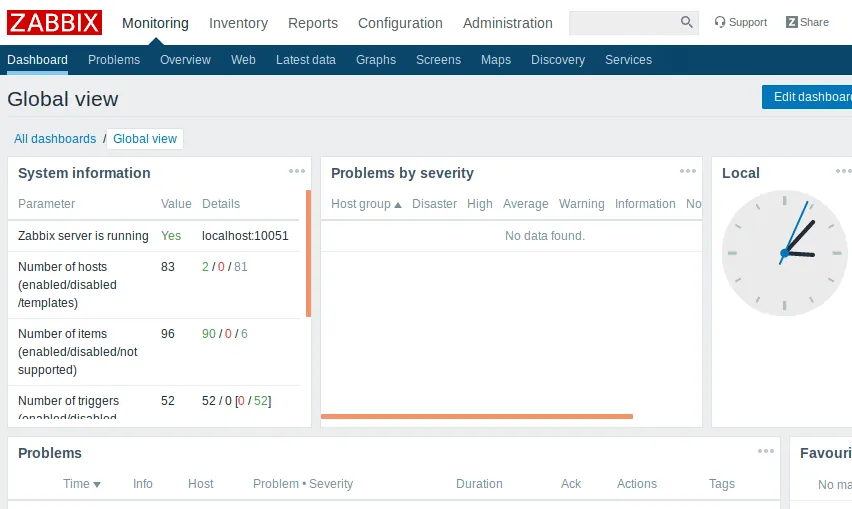
If you see the error below, or your Zabbix server is not running,
#Error: Zabbix server is not running: the information displayed may not be current
then run the commands below to install and execute policies:
    sudo yum install policycoreutils-python
    sudo checkmodule -M -m -o zabbix_server_add.mod zabbix_server_add.te
    sudo semodule_package  -m zabbix_server_add.mod -o zabbix_server_add.pp
    sudo semodule -i zabbix_server_add.pp
14. Restart Services
Restart the services again with these commands.
    sudo service zabbix-server restart
    sudo service httpd restart
    sudo service mariadb restart
15. Reload cache
Finally, reload the cache of zabbix-server.
sudo zabbix_server -R config_cache_reloadZABBIX Agent Installation
Zabbix agents sit on remote servers. They collect data and then send it to Zabbix servers for further processing and calculations. Agents can be Passive or Active, which means the agent and the server can communicate in two different ways. Active agents start the connection with the Zabbix server themselves. If a firewall sits between the agent and the server, prefer an Active agent. That way, you do not have to change firewall settings to open a specific port.
1. To install zabbix agent
Install zabbix-agent with this command.
sudo yum install zabbix-agentThen open the zabbix_agentd.conf file for configuration.
sudo vim /etc/zabbix/zabbix_agentd.confEdit below values and leave other values as it is (default):
- #LogFileSize=1
LogFileSize=100
(increase size of log file to store logs) - #EnableRemoteCommands=0
EnableRemoteCommands=1 - #LogRemoteCommands=0
LogRemoteCommands=1 - #Server=
Server=127.0.0.1
(list of servers that can query your agent and here if server is on same
machine you are working, then use 127.0.0.1) - #ServerActive=
ServerActive=127.0.0.1
(the server’s ip to which agent will send data) - #Hostname=
# Hostname=Zabbix server
(comment this line, server identifies agent by its hostname) - #RefreshActiveChecks=120
RefreshActiveChecks=60
save and exit
2. Enable Zabbix agent
Enable zabbix-agent with the command below.
sudo systemctl enable zabbix-agentAfter that, start zabbix-agent.
sudo systemctl start zabbix-agentFinally, check the status of zabbix-agent.
sudo service zabbix-agent statusNo need to install any additional software on the monitored host.We have walked through the steps to install and configure Zabbix on a CentOS server. We have only scratched the surface of what this powerful monitoring tool can do. Even so, we hope you now understand how to start using it for your own needs. For other monitoring needs, see our products, or read more about the tool on the official Zabbix site.
Need help with your infrastructure?
We build and run custom systems on AWS, Azure and Docker.